


217332 - POS Stand
217332 - POS Stand
With dual AMPS hole patterns and a VESA75 hole pattern.
Normál ár
67.990 Ft
Normál ár
Akciós ár
67.990 Ft
Egységár
/
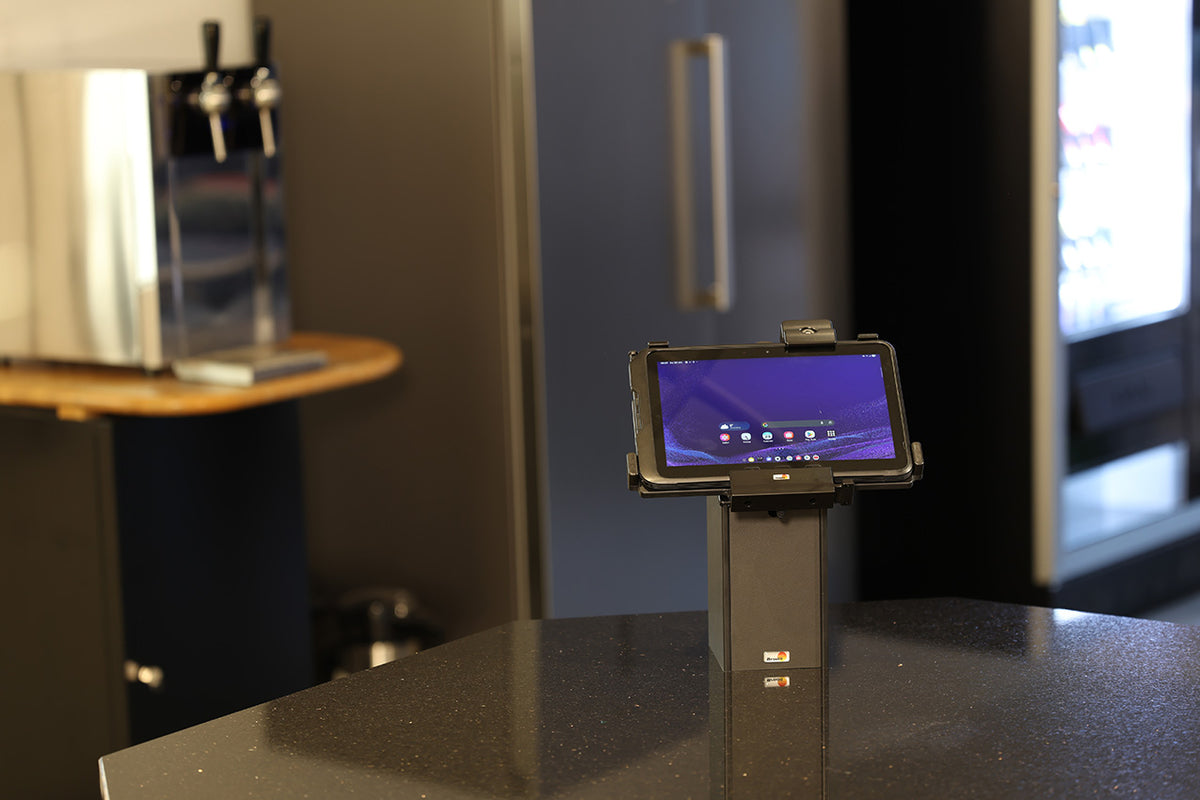
POS Stand for devices used at the point of sale.
Designed for customer interaction. The POS Stand is designed for devices used at the point of sale. Its discreet design fits into different retail environments, while the space to conceal cables keeps the installation neat and tidy. A practical solution for creating an organised checkout area, keeping payment terminals, screens and tablets within easy reach of both staff and customers.
Stable counter mounting. The stand has a stable construction and can be securely screwed to the counter.
Concealed cable routing. The POS Stand keeps cables organised and out of sight, with space inside the stand for cables and a charging box. Holes in the base allow cables to be routed through the counter for a neat installation.
Versatile mounting options. The stand features dual AMPS hole patterns and a VESA75 hole pattern. It is compatible with Brodit holders, cradles and accessories, as well as other AMPS- and VESA75-compatible mounts and devices.
Space-saving flat-pack. Supplied flat-packed to reduce space during transport and storage. Quick and easy assembly with no special tools required. Detailed instructions included.
Made in Sweden. Designed and manufactured by Brodit AB. Made of high-grade ABS. Color: Black.
Designed for customer interaction. The POS Stand is designed for devices used at the point of sale. Its discreet design fits into different retail environments, while the space to conceal cables keeps the installation neat and tidy. A practical solution for creating an organised checkout area, keeping payment terminals, screens and tablets within easy reach of both staff and customers.
Stable counter mounting. The stand has a stable construction and can be securely screwed to the counter.
Concealed cable routing. The POS Stand keeps cables organised and out of sight, with space inside the stand for cables and a charging box. Holes in the base allow cables to be routed through the counter for a neat installation.
Versatile mounting options. The stand features dual AMPS hole patterns and a VESA75 hole pattern. It is compatible with Brodit holders, cradles and accessories, as well as other AMPS- and VESA75-compatible mounts and devices.
Space-saving flat-pack. Supplied flat-packed to reduce space during transport and storage. Quick and easy assembly with no special tools required. Detailed instructions included.
Made in Sweden. Designed and manufactured by Brodit AB. Made of high-grade ABS. Color: Black.
 Egy éves garancia


Beszerelés lépései
Kompatibilis modellek
- Nincs megadott érték